My Sheri Crafts #142


Get ready to celebrate BIRTHDAYS at My Sheri CraftsIt was my turn to pick the theme this time and since the month of September holds so many birthdays among people in my life... I figured it was the right theme to pick


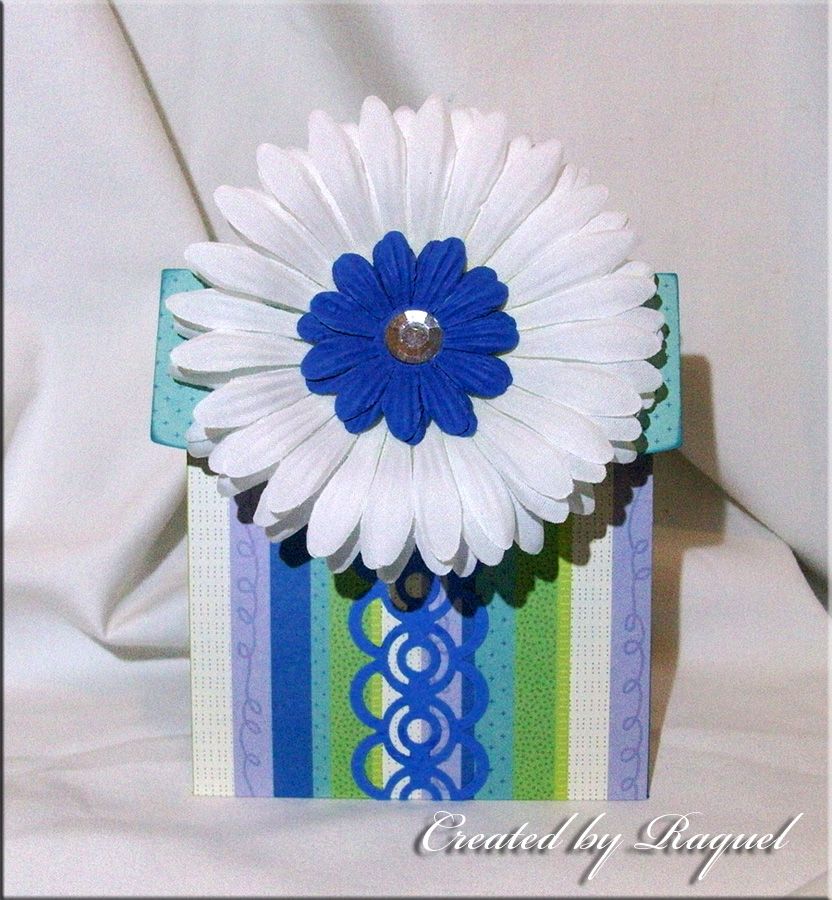
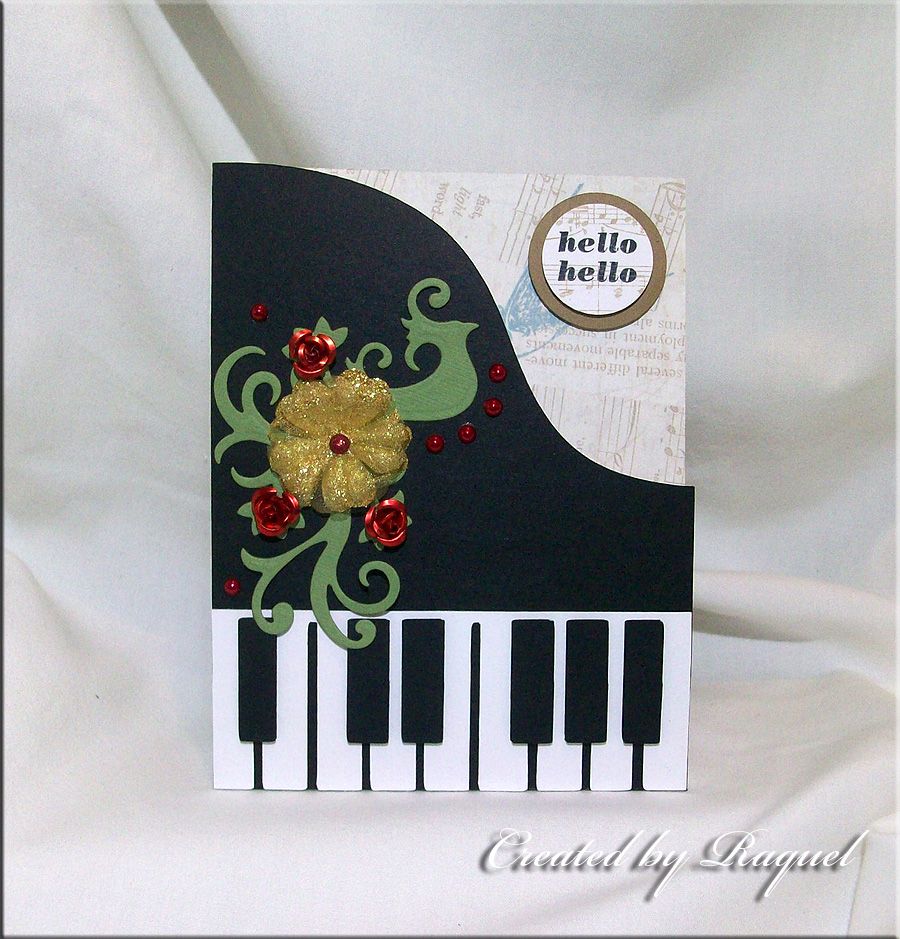
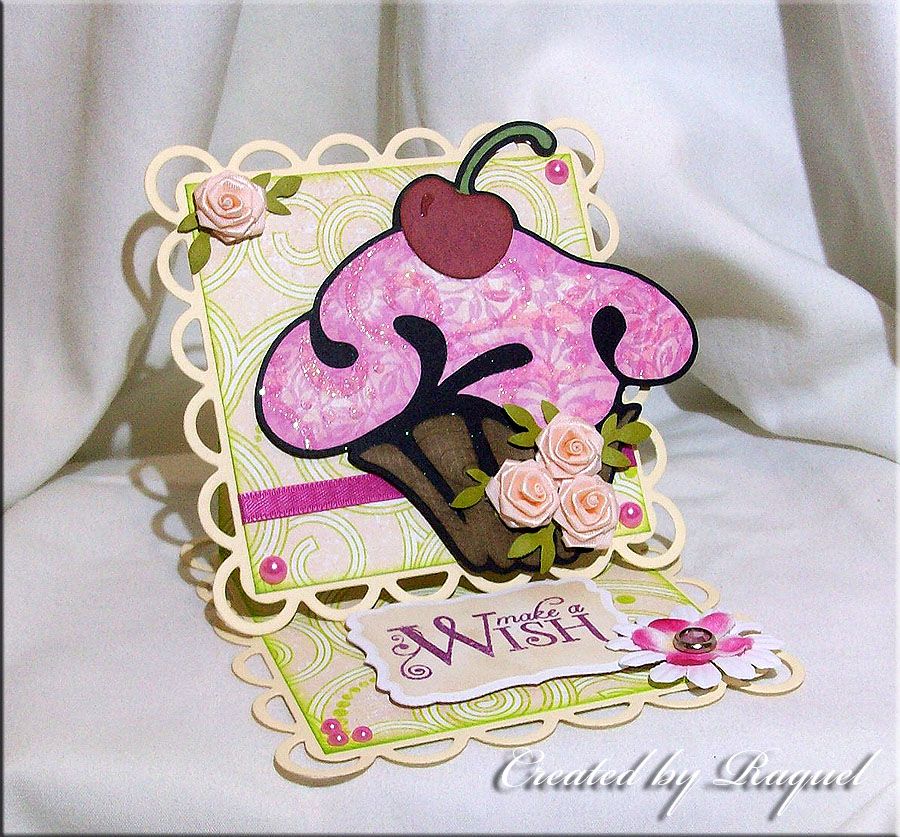
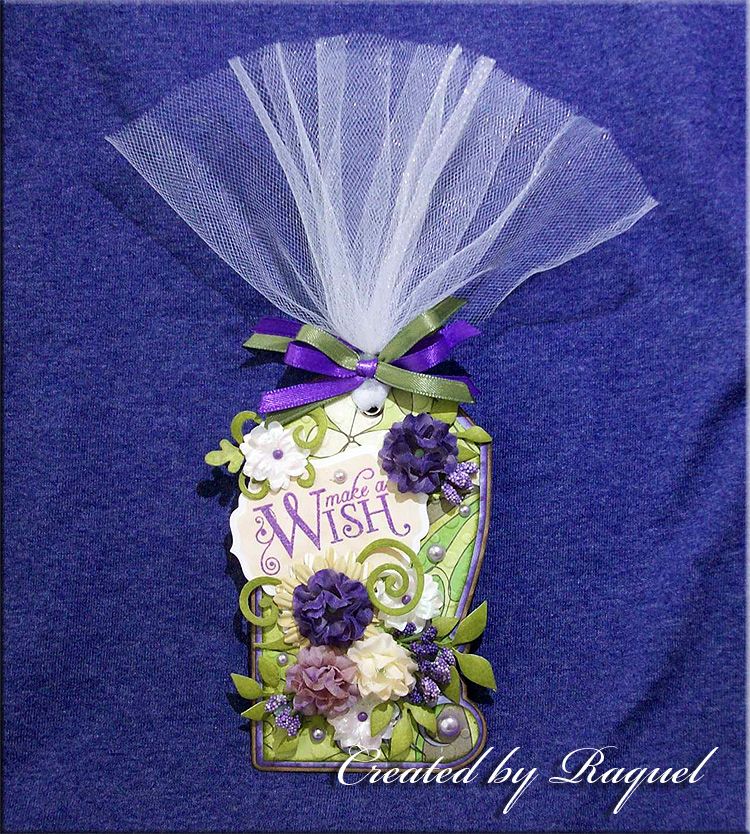
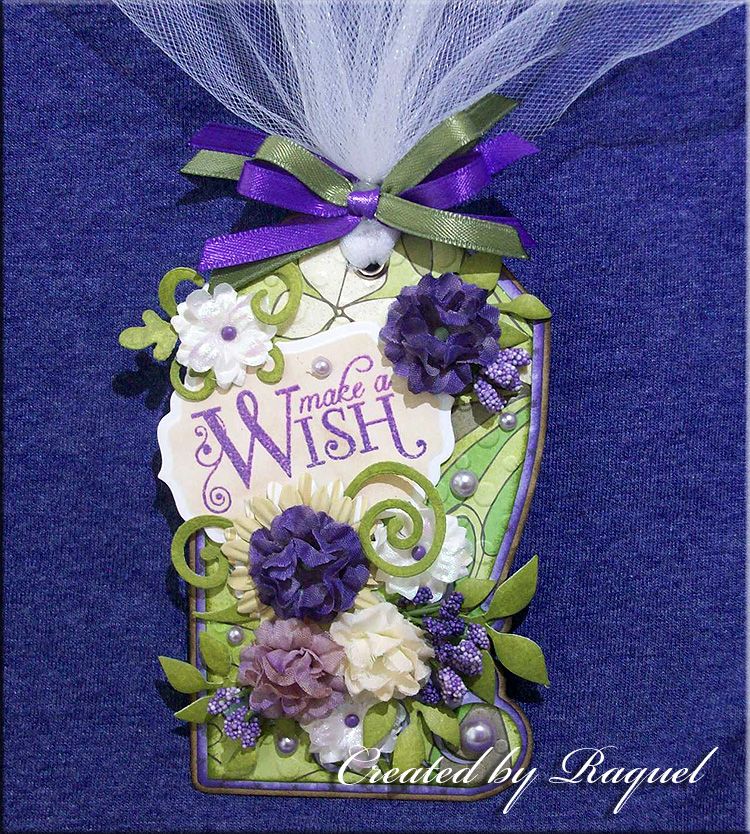
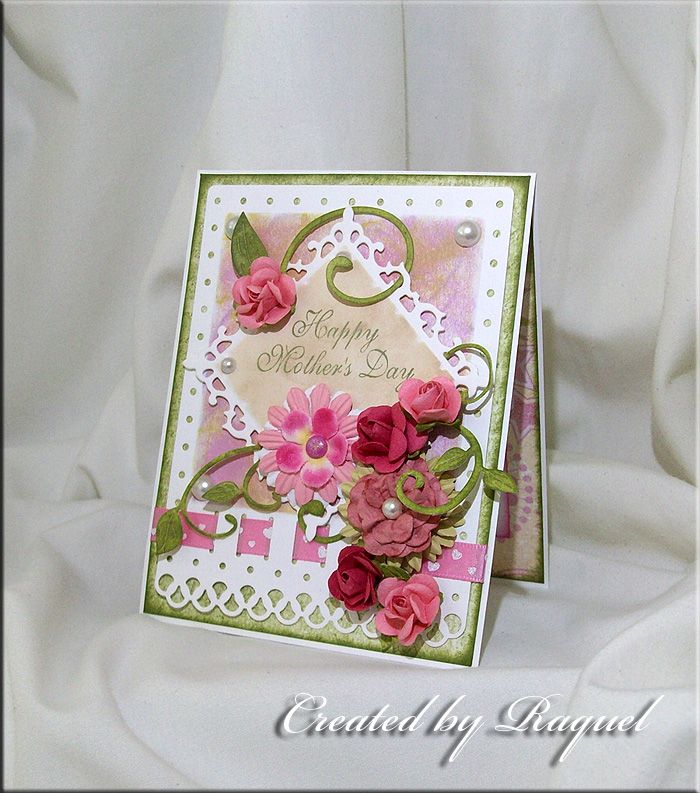
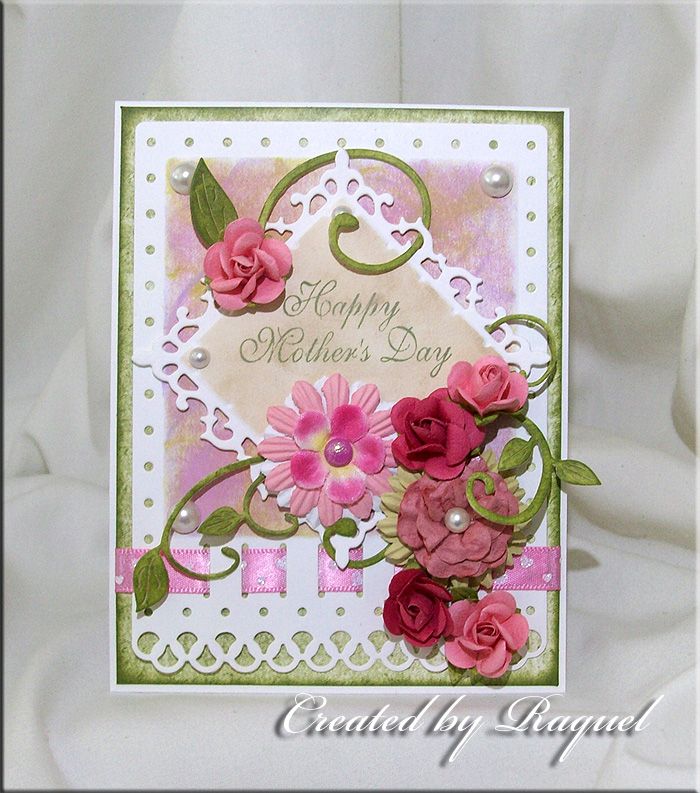
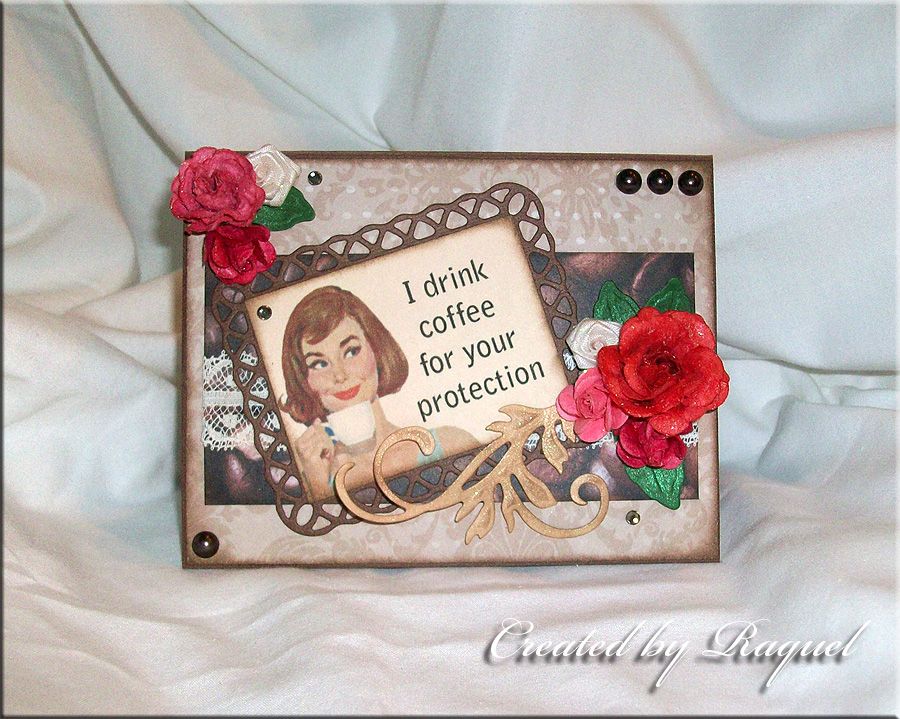
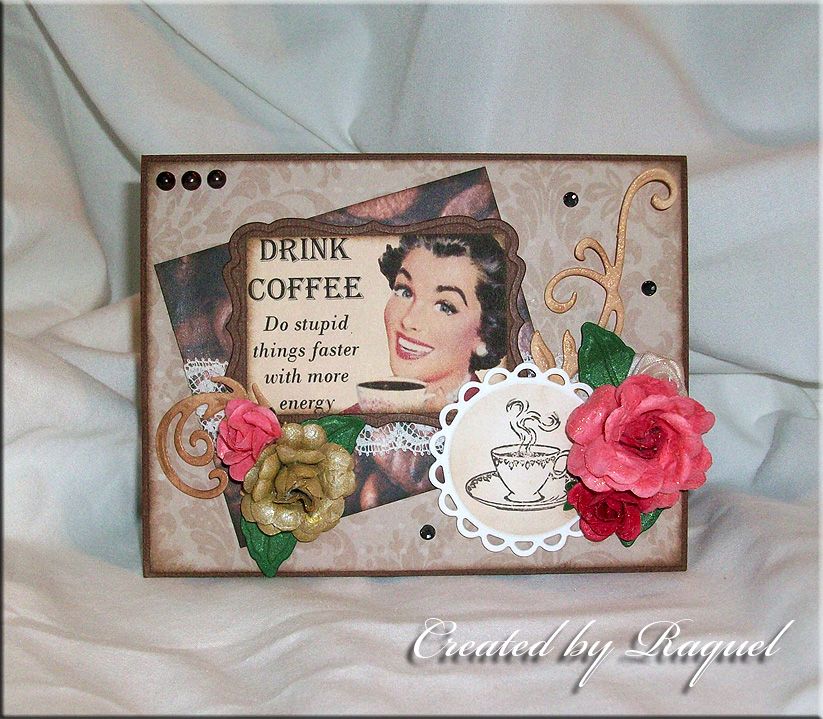
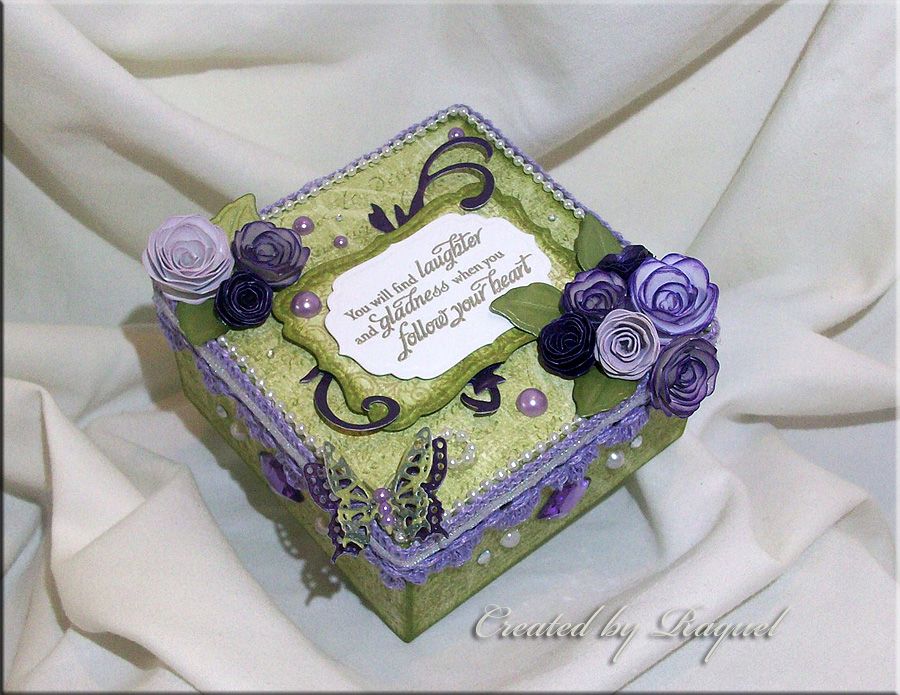
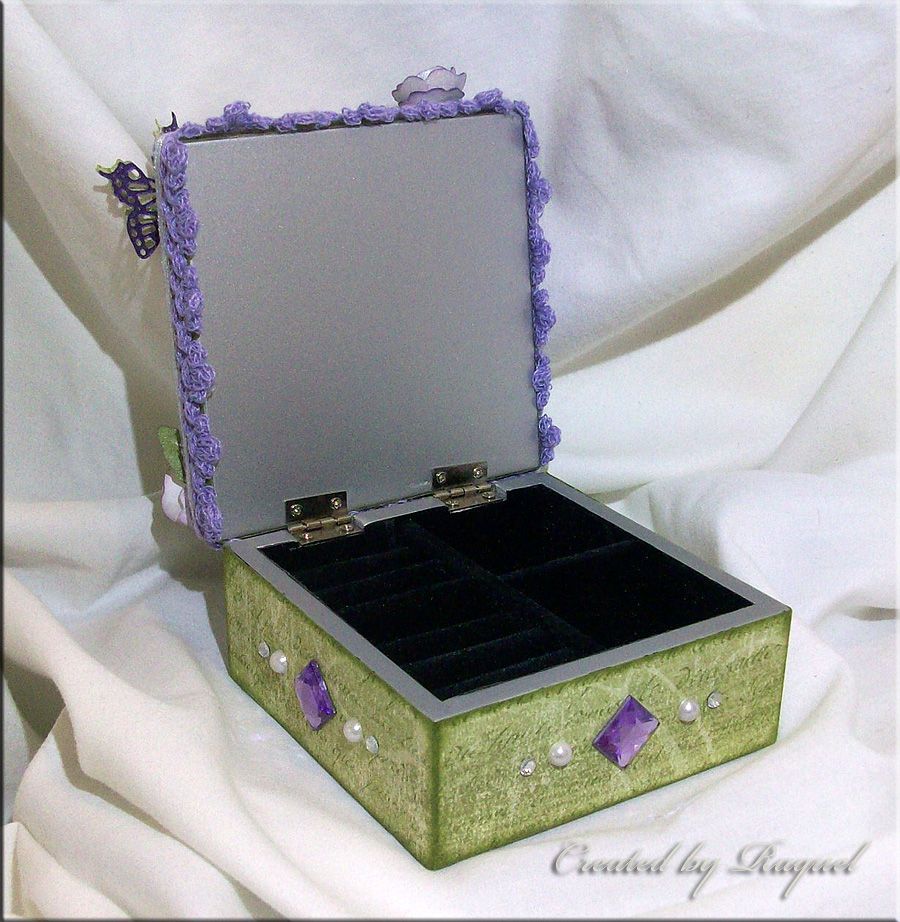
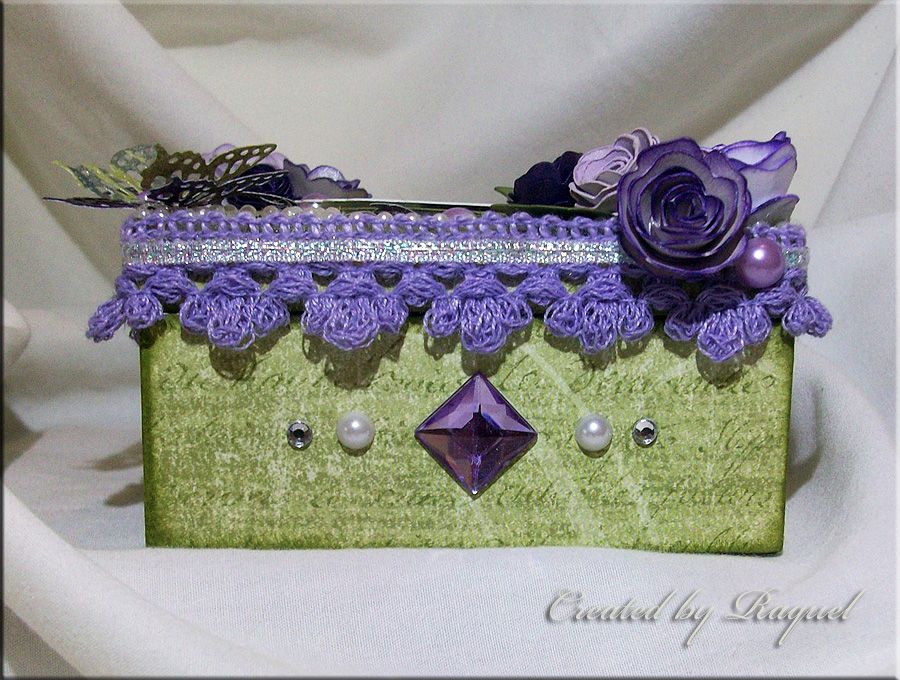
I designed this card to look like a birthday present since most of the time... the card IS THE PRESENT!  

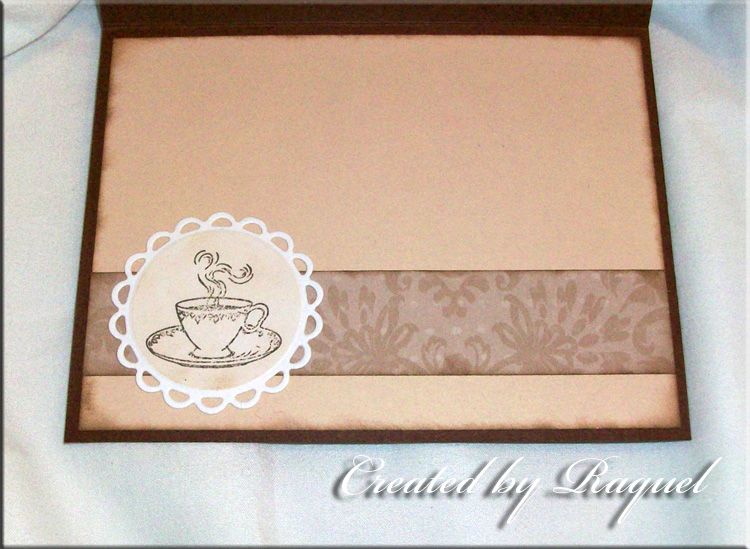
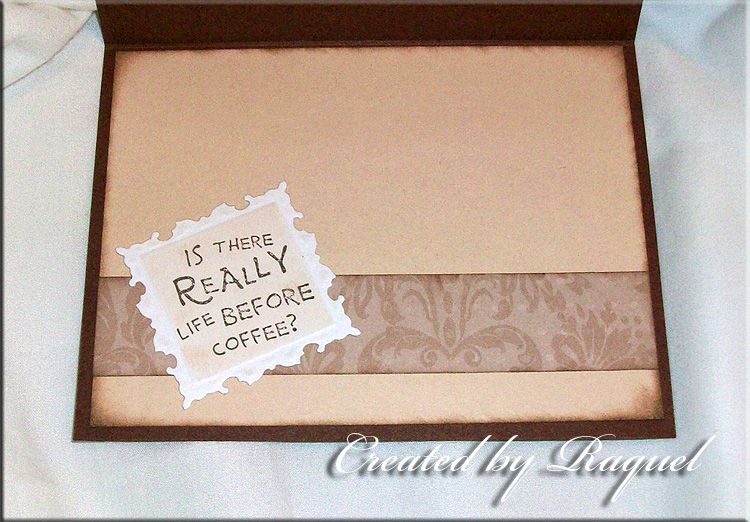
I used double-sided paper so that the top part of the present (which represents the box cover) would match the bottom part.  The bottom part is basically a pocket where the personalized note can slip in.  The border punch trimming is a Martha Stewart punch and instead of a giant bow, $1 stamp inside which I colored with gel markers, and I used silk flowers to finish it up


Thanks for looking!

Now... it's your turn to create something spectacular and join us over at  My Sheri Crafts

My Sheri Crafts #141


It's time for another challenge over at My Sheri Crafts.  Design Team Sister, Sarah, had asked us to create any project with a music theme but especially focusing on the piano.  I found a clipart image online of a baby grand folder and went with it.   I altered the image on Adobe Photoshop so I can cut it in multiple different pieces.  Here is what I came up with...


I used a double sided paper for the inside.  The black keys are popped up to add dimension and I used a flourish bird die cut from Spellbinders to use as my leaves for the metal red roses I've had in my stash.  

Now, to figure out who to give this to...
  

Thanks for looking!

Now... it's your turn to create something spectacular and join us over at  My Sheri Crafts

My Sheri Crafts #140

Angels


Angels... the new challenge over at My Sheri Crafts!  Design Team Sister, Peachy, had asked us to celebrate "Be an Angel" Day on August 22nd, by creating any angel project

Have you ever seen a craft project and thought they are the most adorable things ever?  Then you think to yourself... "I can make that!"


Well that's exactly what I did with these angle ornaments.  I've seen so many of them online and decided to attempt and make them myself


This white one was my first attempt.  I used plain white cardstock and brushed it with white perfect pearls.  The trimmings were from a stash I received from Design Team Sister, Charlotte.  The wings are Cheery Lynn die cut of a butterfly.  The head is a bell you often see in crafts during Christmas time and it's perfect for hanging up the ornaments.  The halo is made from a glittery piece of pipe cleaner


My second attempt is a smaller version and a more perfect size ornament.  I also decided that angels don't always have to wear white, do they?  So, into my stash of scrap papers I go!  The trimmings are also from Charlotte... thank you Charlotte!

Well, what do you think?
 

Thanks for looking!

Now... it's your turn to create something spectacular and join us over at  My Sheri Crafts

My Sheri Crafts #139

Shaped Cards


Shapes, shapes, and more shapes!   That's the new challenge over at My Sheri Crafts!  Design Team Sister, Sandy, asked us to create any card as long as
the shape is not your typical rectangle / square shape


Since we've had a list of upcoming projects for a while, I actually created this card for my son's Kindergarten teacher for Teacher Appreciation week. 


I decided to make it an easel card and display the teacher's name so that she knows that it was especially made just for her. 
I made the apple out of various different apple cuts I found in Cricut Craft Room and cut it with SCAL.  I used a Darice embossing folder for both the leaves and the apple and inked it.  The teacher's name is actually made from the old style label maker and framed with a Spellbinder die cut


 After I made this card, both of my daughters had requested I do the same for their teachers.  Both girls being in Middle School meant having to make 12 more cards (6 teachers each).  The request was a late notice for me so I didn't make the 12 cards as intricate as the first one.

I used the same cut for all 12 cards and also personalized it for each teacher except one.  One of the teachers transferred before Teacher Appreciation Week so I made the last one with the just "Make Learning Fun" tag for whoever happened to substitute that class


Thanks for looking!

Now... it's your turn to create something spectacular and join us over at  My Sheri Crafts

My Sheri Crafts #138

Christmas in July


There's a new challenge over at My Sheri Crafts... Christmas in July (with lots of layers).  That's right!  Design Team Sister, Sue, has asked us to create a Christmas project that includes lots and lots of layers. 


I couldn't really decide on what project to work on but eventually ended up making two things.  Here they are... a wreath and a tree!

For the wreath, I decided to recycle an old book that had missing pages.  I've always admired wreaths made up of newspapers, book pages, music sheets... paper in general.  I found quite a bit of images online of these type of wreaths and decided to make my own for the first time.  What do you think?

The only problem (which I didn't notice until the project was completed) is that each of those cones were rolled up the same way... showing the Author's name at the top.  So, I hope I can find someone who likes Pierce Anthony to give this wreath to


For the tree project, I decided to make multiple layers from using a Fiskar border punch, then folding at each scallop.  It turned out fatter than I had imagined so I stopped at the 9th layer and added a "stem" or base made from a finished roll of glue dots then covered with a coordinating paper from the tree


Here is a view from the top


Thanks for looking!

Now... it's your turn to create something spectacular and join us over at  My Sheri Crafts

My Sheri Crafts #137

FOOD, FOOD, and more FOOD


My turn to choose a theme for a challenge over at My Sheri Crafts... and I chose FOOD !


I have been seeing a lot of cards made from Spellbinder die cut pieces as the base so I wanted to give it a go.  I took a die cut that would fit an A2 envelop and ended up making it an easel card


For my food choice... naturally, I went with cupcakes.  I sooo LOVE cupcakes!  I chose a cupcake cut from one of my original Cricut cartridges... Home Decor.  The coordinating papers are from Basic Gray.  The icing part of the cupcake is embossed with Darice then I used glitter over the embossed section.  I used flowers from my stash and the leaves are from one of Martha Stewart border punches.  The sentiment is a stamp and heat embossed.  Now that I look at it... I don't think it was the best sentiment to use.  I'll probably change it to "You're Sweet" or something along those lines.  Oh well!

Thanks for looking!

Now... it's your turn to create something spectacular and join us over at  My Sheri Crafts

My Sheri Crafts #136


There's a new challenge over at My Sheri Crafts.  Design Team Sister, Sheri, had asked us to make any project that used at least 2 stars


Since I've been making shaped cards lately, I decided to make this project a shaped card as well


The star shape base and all the lettering are made from using SCAL.  Patterned paper is from DCWV.  The 3 miniature stars are brads and the notes are buttons.  The "BEST" is covered with glitter to make it pop 


Thanks for looking!

Now... it's your turn to create something spectacular and join us over at  My Sheri Crafts

My Sheri Crafts #135


Here's an interesting challenge over at My Sheri Crafts.  Design Team Sister, Sue, came out with the  chart below.  Our task was to make any project that used any 3 elements from the chart as long as they formed a straight line


I had quite a difficult time figuring out which row of elements to use... so I ended up using all the elements except a button and an image.


The tag shape is from Cricut cartridge: Picturesque.  Patterned paper is from DCWV and I embossed it with a Darice embossing folder.  The sentiment is a stamp and heat embossed.  The frame for the stamp is a Spellbinder die cut.  The flourish and leaves are Sizzix die cuts.  I used all sorts of different flowers from my stash.  Embellished with pearls all over the place.  The paper piercing is the eyelet on top of the tag.


Seven out of nine elements is not bad is it?

Thanks for looking!

Now... it's your turn to create something spectacular and join us over at  My Sheri Crafts

My Sheri Crafts #134


The newest challenge over at My Sheri Crafts is to create "anything masculine."  Design Team Sister, Sandy, had picked out this theme in preparation for Father's Day... I think.  LOL!  Anyway, I didn't think of how close that holiday was when I created my project.
 
I decided to make a shaped card out of my favorite creature from the fantasy world... a dragon.  The dragon came from a silhouette image of a tattoo.  The background image is a shuriken.  I found both images on-line then I used SCAL to cut them.


The shuriken is made from a metallic silver paper, then embossed.  The dragon's black body is covered with black glitter and it's eyes are covered with liquid pearl.  The inside of the card is made from welding two shuriken images.  I made the card blank because I have no idea what to use it for just yet.  I probably will end up using it as a birthday card someday.


Thanks for looking!

Now... it's your turn to create something spectacular and join us over at  My Sheri Crafts

My Sheri Crafts #133


Exciting new challenge over at My Sheri Crafts ... FLOWERS!  Design Team Sister, Sarah, has asked us to create any project that includes at least 3 flowers.  I love flowers!
 
I decided to take advantage of this challenge and make a Mother's Day card for my mother-in-law.  I wanted to play around with my newest Spellbinder toy... Fancy Ribbon Threader


I used an old stamp for the sentiment and heat embossed it.  The flourish is from Cheery Lynn, the diamond frame is a Spellbinder, and the flowers are all pre-made I've had in my stash.  The ribbon is actually from Valentine's Day... shhhhh! 


Thanks for looking!

Now... it's your turn to create something spectacular and join us over at  My Sheri Crafts

My Sheri Crafts #132


We have a new challenge over at My Sheri Crafts ... it's all about MOMS!  Design Team Sister, Peachy, has asked us to create any project for that special woman in our life (even ourselves).
 
I decided to make a Mother's Day card for my mom.  She loves teapots and hosts a large tea party recital every year as a fundraising for her choir.  She had about 200 people this year show up for her tea party.  Anyway, I've always wanted to make a teapot themed card for her sometime... so here it is!


I found an image of a teapot easel card on the internet from Cosas de La Janette and thought that would be a great card to make so that my mom can display it upright. I used SCAL to create this card.  The papers are from DCWV: Family Bound stack.  The inks and stamps are from Close to My Heart and I used heat embossing to make them pop out and shine.  Flourishes and sentiment frames are from Spellbinders, the roses are from JoAnn's, and the lace trimming is from Design Sister, Charlotte


Thanks for looking!

Now... it's your turn to create something spectacular and join us over at  My Sheri Crafts

My Sheri Crafts #131


It's time for yet another new challenge over at My Sheri Crafts! Design Team Sister, Charlotte, had asked us to make any project with a bit of humor to it
 
I decided to use up some stamps that have been sitting in storage along with some images I had fallen in love with online.  Yes!  Cards related to coffee... why not?  I love coffee although I CAN function perfectly well without them.


For each card, I decided to go a bit on the vintage style since the images of the ladies remind me of vintage.


I kept all the original statement with each image that I saw but altered the font using Photoshop.  Each of the images were printed on beige paper and inked with a darker brown color.  The background paper is DCWV as well as the strip of coffee bean paper... love that!


The stamps are all from JustRite and framed using Spellbinders.  The frames behind each image, as well as the leaves and flourish are Spellbnders.  The smaller flowers were bought as is and the larger flowers I made into roses using store bought single layer flowers.


Thanks for looking!

Now... it's your turn to create something spectacular and join us over at  My Sheri Crafts

My Sheri Crafts #130


The new challenge over at My Sheri Crafts is to create any project except a card.  Design Team Sister, Sarah, had asked us that this project be of Easter theme.  Decorating for Easter has always been all about the kids so instead of making something in the elegant side, I decided to make something more kiddie.

This is what I came up with...


You got it... BUNNIES!  These are wall decor but I will be hanging them on 3 different doors inside the house.  I made them all from the same cut.  I found an image of a bunny silhouette on the internet and cut it with SCAL (Sure Cuts a Lot)The eyes and inner ears are also cut with SCAL.  I used Cricut cartridges for the rest of the cuts.  The egg is from Art Philosophy, tall grass from Create a Critter, and the short grass is from George and Basic Shapes.  I used Liquid Pearls for the small dots on the eyes to give it some shine.  The flourish around the paper egg and the small leaves are Sizzix die cuts.


The cute chick holding up the "Happy Easter" sign is a stamp I got for $1 at A.C. Moore then colored with Copics.  The tiny glittered eggs is from a packet of 30 eggs from the Dollar Store and the flowers are from my stash... random flowers I bought from Michael's and JoAnn's throughout the years


Thanks for looking!

Now... it's your turn to create something spectacular and join us over at  My Sheri Crafts

My Sheri Crafts #129


It's a new challenge over at My Sheri Crafts!  Celebrate the coming of Spring by creating any project that features... what else...  Spring Flowers!   This shouldn't be too hard of a task.   For this theme, I decided to create yet another wreath.  I didn't have a Spring wreath other than the Easter one but since Easter is not until April 20th, I needed to hang something up without eggs on it :) 

This is what I came up with...


I got the basic dried vine wreath from JoAnn's Crafts... what a pain to remove all the dead dried leaves stuck between the vines!  Anyway, after it was all cleaned up, it was time to bust out the hot glue gun.    


The cute glittery birds are also from JoAnn's Crafts.  They were so adorable, I had to add them in.  I had a lot of these large flowers already in my stash so it was great having to use them up


Thanks for looking!

Now... it's your turn to create something spectacular and join us over at  My Sheri Crafts

My Sheri Crafts #128


As a new challenge for us over at My Sheri Crafts, Design Team sister, Peachy, has asked us to create any project with lots of bling!  I took this opportunity to finally alter a plain old jewelry box I had picked up at a Goodwill Store for $2 over a year ago.  It has been sitting in storage waiting to be redecorated.  This is what I came up with...


I was inspired by last week's "vintage" theme for this project.  The paper I picked out already had the effect of being distressed then I made sure to ink it up a lot on every edge and corner of the box.  The flowers are rolled up flowers from the Cricut cartridge: Artiste and inked up as well


The inside of the box... as you can see, the old paint on it was a glossy silver and I kept that color and carried it through the new decor.  I used silver embossing for the sentiment on the top front of the box


As for the "bling" theme... each side of the box are also dressed up in more bling.  I would also like to thank Design Team sister, Charlotte, for the violet trimming.  I found it in the pack of trimmings she had sent me ages ago


Thanks for looking!

Now... it's your turn to create something spectacular and join us over at  My Sheri Crafts


Box size: 4" x 4" x 2"

Supplies used:
Cheery Lynn: butterfly die cut
Close to My Heart: stamped sentiment and inks
Cricut cartridge: Artiste
K&Company: paper
Spellbinder: flourish and sentiment frame

My Sheri Crafts #127


Design Team Sister, Sue, has a new challenge for us over at My Sheri Crafts.  She had asked us to make a "vintage male" card with lots of inking!  No clean, crisp lines at all

I don't think I've ever made a vintage card, so here is my attempt...


The papers I picked out are already textured.  The top background paper is already faded.  Everything is inked with brown.  The image is something I downloaded from the internet.


The inside of the card talks about the 1957 Mercury station wagon picture in the front.  It's the car my father-in-law grew up with and he always says "... old fart" when referring to anyone old.  So, I figured it's his turn to be called  an "old fart"


Thanks for looking!

Now... it's your turn to create something spectacular and join us over at  My Sheri Crafts


Card size: 4.25" x 5.5"

Supplies used:
Image from the internet
Print outs from the computer
Martha Stewart - border punch
Screw specialty brads
Lots of brown inking 

My Sheri Crafts #126


It's February!  Design Team Sister, Sandy has picked out a new theme over at My Sheri Crafts to kick off this new month.  Make any project with "hearts"... you can bet we're going to get a lot of Valentines entry!

Well, what a perfect theme to get my Valentine goodies started.  I made these three favor boxes as samples... yes, just samples.  I have to make at least 21 more of them!  They are for my son's Kindergarten class.  They are doing a treat exchange for Valentine's Day.  I left each of them without any sentiments or messages since my son has to pick them out first. 


The treat boxes are from Cricut cartridge: Tags, Bags, Boxes, and More.  The flap on the top forms a "heart" when put together.  I plan to make each treat box unique... no repeats! 


Thanks for looking!

Now... it's your turn to create something spectacular and join us over at  My Sheri Crafts


Treat box size is 2" x 2"

Supplies used:

Cricut cartridge: Tags, Bags, Boxes, and More
Martha Stewart - border punch

My Sheri Crafts #125


Happy New Year!  My first entry for 2014 and it's also the first theme back at My Sheri Crafts!  To kick of the new season of challenges, our very own Sheri, picked the theme to use digis on any project.  

I decided to take advantage of this theme to print out a whole bunch of Precious Moments baby digis from an on-line coloring book page.  Would you believe it?  So many  babies within 2 months!

For my next door neighbors... they had twins on December 18th...


For my cousin, Nicole who had her second baby on December 30th...


For my cousin, Monica who also had her second baby on January 2nd...


I actually have two more baby cards to make!  My neighbor from three doors down is due this week with her second baby and my sister-in-law is also having her second baby... I better start working on those.


Thanks for looking!

Now... it's your turn to create something spectacular and join us over at  My Sheri Crafts


All cards are 5.5" x 4.25" in size

Supplies used:

Papers: DCWV
Sentiments are all stamps
Digis from Coloring Book
Copics
Darice
Fiskars floral punch
Liquid Pearls
Sizzix die cut
Spellbinder